

Learning how to measure a bay window for curtains takes a helper, a long metal tape and a little patience, and by the end you will have one complete set of measurements for your own bay, ready to talk through with us before anything is forged. We cover angled, square and curved bays, and you can print our bay window measuring guide to keep beside you.
What You Need Before You Start
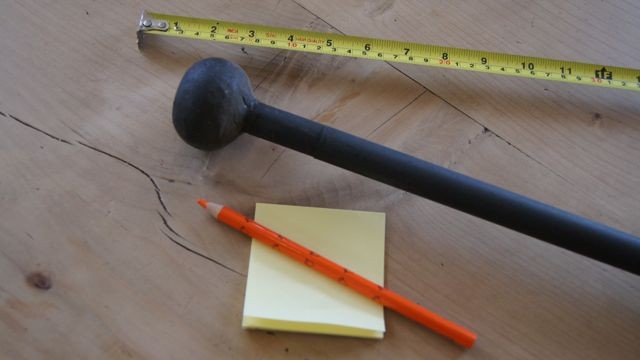
You will need a metal tape, ideally five metres long because three metres is too short for a bay, a pencil and paper, a stepladder if the pole sits high, and four Post-it notes labelled A, B, C and D, each with a dot and a line so you measure to the same mark every time. We strongly advise a helper, because accuracy matters so much, and a curved bay needs more hands still.
These rules keep every figure trustworthy:
- Measure in millimetres and write down the exact reading, without rounding.
- Keep the tape level and taut.
- Never read from a bent tape. If it has to bend, start from the hard-to-reach end so it runs straight.
- Measure every line separately, because true symmetry rarely exists in the real world.
- Measure at the height where the pole will sit, and to where you want the finials to end.
Words You Will See
- Bend: a corner in the pole, where it turns to follow the next wall.
- Diagonal: a straight measurement across the bay between two points that are not neighbours.
- Return: an optional length at each end, where the pole turns back to the wall.
- Passing bracket: a bracket the curtain rings slide over, so your curtains travel right round the bay.
- Drawback: the space at each side where your curtains gather when open.
Which Bay Shape Do You Have?
Count the sides of your bay and the pole will have one fewer bend than that, and we forge poles with one to 7 sides to them, as well as curved bays. In older houses a short side tucked against the wall is easy to miss, and it is one we regularly spot on the sketches customers send us. If yours is a period home you are in good company, as about a fifth of owner-occupied homes in England were built before 1919.
| Your bay | Its pole page |
|---|---|
| 2 sided | 1 bend pole |
| 3 sided | 2 bend pole |
| Square, 3 sided | Square bay pole |
| 4 sided | 3 bend pole |
| 5 sided | 4 bend pole |
| 6 sided | 5 bend pole |
| 7 sided | 6 bend pole |
| Curved | Curved bay pole |
Each page holds the measurement boxes and a diagram for that shape, and the price calculates automatically once your measurements are in. If your bay looks like none of the diagrams, we can still make the pole and may ask for a little more information.
Should Your Curtains Follow the Bay or Hang Straight Across?
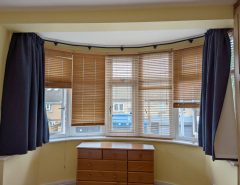
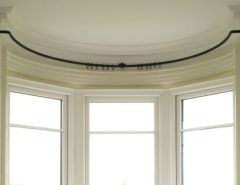
For a period home we recommend a pole that follows the bay, because it keeps the lovely shape of the window and lets your curtains frame the glass on every side. A pole straight across the front gives a single clean line and hides the bay. Following the bay or hanging straight across is a choice we talk through with customers on the phone.
For light, a pole that follows the bay needs drawback in its first and last sections so the curtains gather beside the glass.
Closed curtains help keep the warmth in with either layout, so the choice comes down to look and light. Warm, well-fitting curtains matter in an older house, as fewer than three in ten homes built before 1919 reach energy efficiency band A to C.
The steps below are for a pole that follows the bay. For a straight pole, measure the opening plus the drawback beyond each side, using our straight curtain pole measuring video and guide to measuring for a curtain pole.
How to Measure an Angled Bay Window
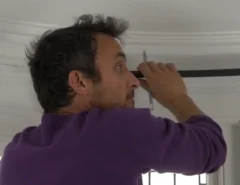
Start by labelling the two finial ends and each corner with lettered Post-its at pole height, measure every wall between them, then measure the diagonals across the bay and the full span from end to end, writing each figure down in millimetres as you go.
- Label the points. Put A on the left where the finial will end, anywhere on the wall or frame, B and C in the middle of the two corners at pole height, and D where the right finial will end.
- Measure each wall: A to B, B to C and C to D.
- Measure the diagonals: A to C and B to D.
- Measure the full span from A to D.
- Write it all down in millimetres, with the letters beside each figure.
Your figures go into the shape page, which checks them automatically, and an accuracy of 10mm or under means you are good to go. A bay pole typically needs two standard brackets, one centre bracket and two or four passing brackets. Our 2 bend bay measuring video shows every step.
Bays With More Bends
Bays with more sides carry the same lettering on round the bay, so for a five sided bay with four bends the points run from A to F:
| What to measure | Measurements |
|---|---|
| Window width | A to F |
| Walls | A to B (including finials), B to C, C to D, D to E, E to F (including finials) |
| Diagonals | A to D, A to E, C to E, C to F, B to D, B to E, B to F |
| Returns (optional) | 1 to A and F to 2 |
How to Measure a Square Bay Window
A square bay has three sides and square corners, and you measure it like an angled bay, right to the corners of the wall: A to B and C to D (both including finials), B to C, the full span A to D, and the diagonals A to C and B to D. Square bays are rarely completely square, so take each line with care. Returns, 1 to A and D to 2, need at least 450mm each, and every figure goes on the square bay window pole page.
How to Measure a Curved Bay Window
To measure a curved bay window, you need two measurements and a paper template, plus a tape, a spool of string, a pad and pencil, and three people.
- Measure the width, A to C, from one wall corner to the other, with the tape held taut between two people.
- Stretch the string straight across the deepest part of the bay and measure from its middle to the deepest point of the curve. This is the depth, B to D.
- Write both down in millimetres.
If the pole wraps round a corner, the returns from 1 to A and C to 2 need at least 420mm each including finials, and recess brackets suit a bay set into a recess. We then ask for a thick paper template of the curve, fitted evenly where the pole will sit. Our guide to making a curved bay template and curved bay measuring video show how, and the curved bay pole page is where you enter your figures.
Returns, Height and Drawback
- Returns, if you want them, run from 1 to A and from your last letter to 2.
- Height: the pole ideally sits 15cm above the window, or halfway between the ceiling and the window if your ceiling is low.
- Drawback: allow about 10% of the window width at each side, adding a centimetre or two for heavier curtains.
- Finials: the pole length always includes them.
- Projection: a standard bracket sits the pole about 65mm from the wall for a 20mm pole and 70mm for a 25mm pole, so check it clears handles, radiators and window boards. A radiator under the bay is usually the first clearance we ask about, because the curtains need room to hang in front of it.
Measure for the curtains once the pole is up, taking three readings from the pole to where they should finish, left, middle and right, and use the longest, because floors and sills are rarely level.
Checking Your Measurements Before Anything Is Forged
Every bay pole is forged to your own measurements, so we take great care over them before the iron meets the fire. For angled and square bays the shape page checks your figures automatically, and we are happy to talk your measurements through with you before forging begins.
If you are unsure, or your bay matches none of the diagrams, send us:
- your measurements with their letters
- a rough sketch of the bay from above
- two or three photos from inside, showing the corners and the wall above the window
- your paper template, for a curved bay
Call us on 01473 487118 or use our contact form. We guarantee the fit on all our ironwork, bay poles included, when your measurements are accurate, and our bay window curtain poles made to measure are all in one place. Our videos on installing a 2 bend bay pole and installing a curved bay pole show the fitting.
Frequently Asked Questions
Do I Measure to the Finials?
Yes, measure to where you want the finials to end, because the length of a bay pole includes its finials. Stick your first and last Post-its at those points, on the wall or window frame, so the pole sits where you pictured it.
How Accurate Do My Bay Window Measurements Need to Be?
Measure to the millimetre and write down the exact reading, without rounding up or down. When you enter your figures on an angled or square bay page, the page tests them for you, and an accuracy of 10mm or under means you are ready to order.
How Do I Find the Angle of My Bay Window?
You can leave the protractor in the drawer, because the diagonals you measure across the bay describe the angle of every corner and we can work the angles out from your measurements. Take each diagonal carefully at pole height, and your figures tell us the rest.
Should I Measure Along the Window Sill or Where the Pole Will Go?
Measure where the pole will go, at pole height, because that is the line your pole will follow. Adding up the wall lengths gives part of the picture and the diagonals give the rest, so measure both and your pole will match your bay.
Can Someone Check My Measurements Before My Pole Is Made?
Yes, we are happy to talk your measurements through with you before forging begins, and for angled and square bays the shape page sense checks your figures too. Send them with a sketch and a few photos, and we will take it from there.
Leave a Reply
You must be logged in to post a comment.